When it comes to gift-giving, nothing beats the thoughtfulness of a box of homemade cookies. Whether it’s for the holiday season or just a friendly visit, they are a great way to make your family and friends feel special.
Today, I’m sharing two cookie recipes to get your boxes started and with the latest holiday bakeware available at Kitchen Stuff Plus, creating your baked goods has never been easier. Let’s get baking!
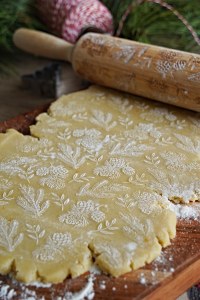


These Orange Cardamom Embossed cookies may look intimidating to make, but with the right tool – embossed rolling pin – you can effortlessly create a variety of prints. I used the pinecone option for mine. The combination of citrus and spice offers a deliciously unique flavour that’s sure to impress, and the embossed pattern adds a lovely touch!
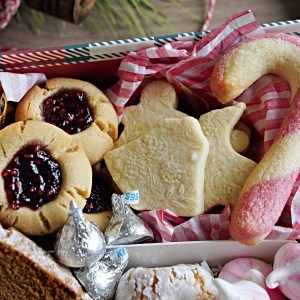
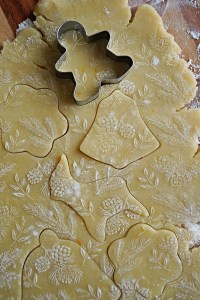
I used both cookie cutters and this set to cut out the shapes. To get a good print on the cookies, roll out your chilled dough using a standard rolling pin then press down on the embossed rolling pin as you move across the dough. The outcome is magical!
I used this trio of baking trays to bake the cookies in batches and layered them with this reusable silicone baking sheets which have a print to help you size your cookies. So handy!
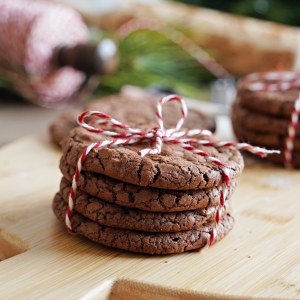

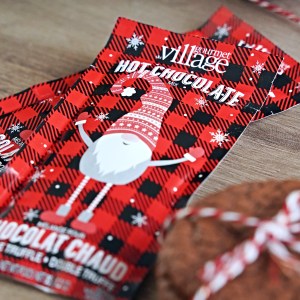

The second recipe is a family favourite and one for the chocolate lovers – hot chocolate cookies. These packets have been a family favourite holiday drink, so incorporating the mixture into my cookie boxes only made sense. These crisp edged, chewy centered cookies will be a guaranteed hit with the kids too!

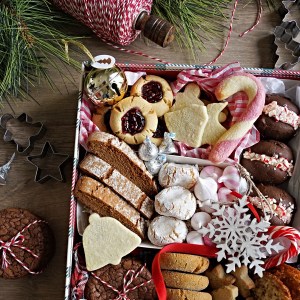
How to make a cookie box
Cookie boxes are easy to make. Here are some suggestions:
- Choose the right box or tin for the number of cookies you’re baking. During the holiday season, there are a ton of options, including these from KSP. Use fillers such as muffin cups, tissue paper, or candies to enhance the look of your box.
- Choose the cookies. Plan your cookies ahead of time. Sort out your ingredients collectively so you reduce the number of trips to the store.
- Make a schedule. Bake similar cookies together and spread out the baking over a span of a few days, or even weeks!
Holiday cookie boxes are a wonderful way to showcase your baking skills and creativity. So, whether you’re gifting them to loved ones or simply enjoying them yourself, holiday cookie boxes are sure to bring joy and delight to all who receive them.
Embossed Orange Cardamom Cookies
Prep Time: 15 minutes, Cook + Chill Time: 50 minutes
Ingredients
- 14 tbsp unsalted butter, cold and cubed
- 1/2 cup powdered sugar
- 1 egg + 1 egg yolk
- 3 cups flour
- 2 tbsp orange zest
- 1/2 tbsp ground cardamom
- Pinch of salt
Directions
- Mix all ingredients in a stand mixer. Form 2-3 balls.
- Roll out the dough using a standard rolling pin to ¼ inch thick.
- Flour the embossed rolling pin to prevent it from sticking.
- Press the embossing pin onto dough and slowly roll it across.
- Cut with cookie cutter and place in freezer for 30 minutes to set.
- Bake for 20 minutes at 350F and then cool for 10 minutes on a cooling rack.
Hot Chocolate Cookies
Prep Time: 15 minutes, Cook Time: 10 minutes, Total Time: 25 minutes
Ingredients
- 4 tbsp hot chocolate powder
- 5 tbsp cocoa powder
- 1/2 cup granulated sugar
- 1/2 brown sugar, packed
- 1 tsp vanilla extract
- 2 eggs, room temperature
- 1 tsp baking powder
- 1/2 tsp salt
- 1/2 cup unsalted butter
- 3/4 cup semi-sweet chocolate chips
- 2/3 cup flour
Directions
- Preheat oven to 325F and line baking sheets with silicone baking mats.
- Melt chocolate chips and butter together until smooth.
- Sift in hot chocolate powder and cocoa powder and fold until mixed well.
- In a stand mixer, beat sugars, eggs, and vanilla until creamy (4-5 minutes).
- Pour egg mixture into chocolate mixture and fold until well combined.
- In a separate bowl, whisk the flour, baking powder, and salt. Add the flour mixture to the chocolate and egg mixture. Fold until just combined.
- Scoop dough batter onto baking sheets, 2 inches apart.
- Bake both trays for 10 minutes and let cool for 5 minutes.
—

Christine Kozovski is a mom, food photographer and health & safety professional based out of Toronto Ontario. She shares her passion for food through easy and fresh recipes that can be found on her blog and Instagram account. She gets her food inspiration from her parents, growing up with both Asian and Mediterranean influences as well as places she’s travelled. Her adventurous side shines through when she gets to explore new cities and try new foods.